Showing posts with label scrapbook. Show all posts
Showing posts with label scrapbook. Show all posts
Wednesday, September 28, 2011
Masking tutorial
Summer is winding down, but you can still create summery cards to brighten someone's day. In this tutorial, you'll learn how to use masking to lay one image on top of another without letting colors bleed or blend. Then, you'll follow the assembly of the rest of the card.
Thursday, September 22, 2011
Cricut CTMH Art Philosophy Cartridge flower

Friday, July 8, 2011
Great deal!
 |
| http://ashleyanne.myctmh.com |
Wednesday, June 15, 2011
Promise of things to come...
I'm making a commitment to actively blog again. I've resigned from my full-time teaching position to spend more time with my family. As a result, I will have more time for crafting and gardening with my kids and on my own. I've also taken on a little part-time work with my church and as a Close To My Heart independent consultant. Close To My Heart is a stamp/scrapbook/craft company with clear acrylic stamps, which are high-quality and easy to use. You'll start to see more of their products appearing in my videos and pictures, as I find them much easier to use than the rubber stamps I used to use.
So, without any delay, here is a digital scrapbook layout. Close To My Heart has a deal this month (June 2011) where you can create a Studio J online layout for free, and then download the .jpg file at no cost. You can then print it at home, post it to Facebook, or do whatever you choose with it. Typically, you have to purchase the layout prints through Close To My Heart in order to get a .jpg file, but this is a .jpg with no obligation. This is a great way to test out Studio J and see if a different mode of scrapbooking is for you. I had never used Studio J before, and I have to admit, it was pretty fun using all of the digital embellishments, layouts, and papers they had to offer. Because it uses professionally designed layouts with perfectly coordinated papers and add-ons, my product is much better looking than any of the photo book products I've create through other websites.

When you order, you have to go through the checkout process to receive your free .jpg. It takes about 15 minutes to process and will be sent to your email address. You will receive one file of the entire layout for posting online, like the one above. You will also receive separate files of each page of the layout that are of higher quality and do not have the Studio J information at the bottom of them. I highly recommend you try this while it is free!

When you order, you have to go through the checkout process to receive your free .jpg. It takes about 15 minutes to process and will be sent to your email address. You will receive one file of the entire layout for posting online, like the one above. You will also receive separate files of each page of the layout that are of higher quality and do not have the Studio J information at the bottom of them. I highly recommend you try this while it is free!
Visit http://ashleyanne.myctmh.com to try Studio J for free this month.
Tuesday, May 1, 2007
Stamps - an economical way to scrapbook
As any scrapper knows, paper and embellishments can get pretty expensive. But, if you use stamps to create your own backgrounds and embellishments, you can get a lot more bang for your buck!
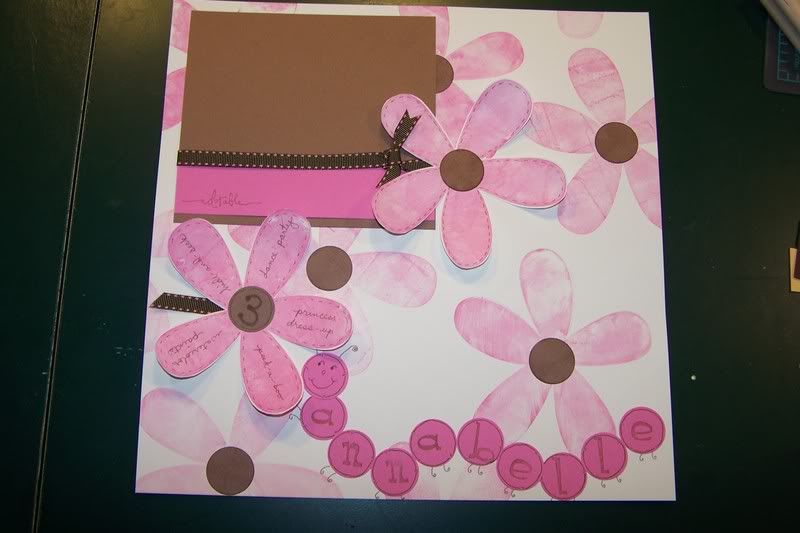
The photo to the left shows an example of how you can make a really fun scrapbook page without spending a lot of money on extra embellishments. I used Stampin' Up!'s Big Blossom stamp to create the background flowers. Then, I added brown punched circles to the centers. You can see that I also made two Big Blossom images that I cut out and adhered to the page. I doodled faux stitching along the edges of both of these. On the far left flower, I put a 3 in the center and things my daughter enjoys on all of the petals. The caterpillar is made from circles punched from pink paper, and I used an alphabet stamp set to make her name. The caterpillar face, antennae, and feet are all hand doodled. The brown matting is where I'll be putting her photo.
The Big Blossom and alphabet stamps can be used over and over on many different pages, and you can achieve different looks with them by using different colors and stamp techniques. The initial cost of the stamp is often more pricey than the average scrapbook embellishment, but the amount of use you get from it makes up for it over time.
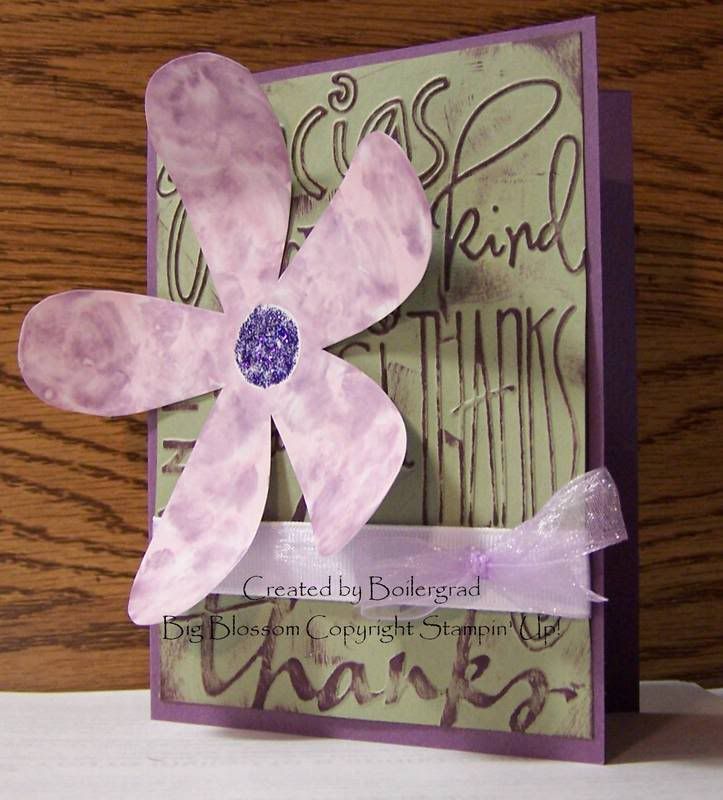
Here is an example of another way to use the Big Blossom stamp to achieve a very different look. This look is very easy using the "Faux Shaving Cream" technique, which is explained here:
http://stampsandflowers.blogspot.com/2007/04/faux-shaving-cream.html
Subscribe to:
Comments (Atom)